CORVETTE WE COOLIN' FOOLS
Standing next to the incredible clean, candy painted yellow Aventador. Best in show - NO DOUBT!
Sunday, March 30, 2014
Car Tech News - Head to Head Super Coupes!
Just updated the Car Tech News page, found in the right column of the blog. Watch the video of the Mercedes-Benz C63 AMG coupe VS. the Audi RS5, then leave a comment about which car is faster and how you would customize it!
CAR TECH NEWS
CAR TECH NEWS
Labels:
audi,
bmw,
car show,
cars,
coupe,
design,
drag,
drawings,
drift,
how-to,
lamborghini,
mercedes,
racing,
speed,
step-by-step,
technology
Friday, March 28, 2014
Audi R8 - Finished Product
Always shade left to right if you are right handed and right to left if you are left handed, to reduce smudging. The inside of the car is very dark. Use your eraser to create a reflection effect in the windshield. For the air vents and front grill, draw small circles inside each diamond made by the cross-hatching. The fenders are usually darker than the rest of the body of the car. Put a dark underlay beneath the car to create a shadow effect. Always shade lightly, its easier to make darker than lighter. TAKE YOUR TIME. Practice makes perfect. If you don't have a way to smudge your pencil marks, use your finger to spread out the graphite to make an even shade.
Labels:
artist,
audi,
bmw,
design,
drawings,
how-to,
lamborghini,
mercedes,
sketch,
step-by-step,
technology
Thursday, March 27, 2014
Car Tech Update - 2015 Lamborghini Huracan
Check out the review and spec of "The Creature Car", the 2015 Lamborghini Huracan, set to drop this fall.

Car Tech News
Wednesday, March 26, 2014
Audi R8 - Outline, No Shading

The Audi R8.
My dream car, and definitely my favorite of Audi models. Today, I'm going to show you how to draw the outline of it from this angle (seen above).
But first, some stats.
Engine 5.2 L V 10-cylinder
Drivetrain All Wheel Drive
Transmission 7-speed Automated Manual
Horse Power 525 hp @ 8000 rpm
Fuel Economy 13/22 mpg
Bluetooth Yes
Navigation Yes
Heated Seats Yes
Alright, now to the drawing.
All instructions are simply guidelines. The pictures are probably going to serve you better than the words.
Start with the wheels and a baseline. I also started on the back fender here a little bit. In the picture below, you can see that the angle of the baseline above the horizontal is about 15-20 degrees. If you want to accurately draw a car, I recommend that you have a protractor some something that measures angles.
Add the bottom line that is parallel to the baseline.
Estimate about where the bottom of the windows should go and draw a line parallel to the baseline. Always check your measurements with your reference picture. Then add the trunk and an additional line that will follow your fender lines.
Next, add the bottom of the windshield. For the Audi R8 at this angle, the bottom of the windshield is parallel to the horizontal side of your paper. It also happens to be the same length as the distance between the bottom of the tires (5 inches in my drawing).
Next, add the far side of the windshield, which is at a 40 degree angle above the horizontal. This angle will gradually curve to form the top of the car and meet up with the trunk. Keep the 40 degree angle for at least an inch or two before curving it tho. Always erase and retry to make it look good.
Now for the bottom of the front bumper. Draw a line parallel to the horizontal slightly above the bottom of the front tire. It's really up to you how much of a low-rider you want your car to be. The front bumper should be a little bit longer than the side of your car.
Now, that horizontal line you just drew is just a guideline. You can now lightly sketch the bottom of the front bumper. There is a slight curve to it, as you can see above.
Add a line underneath to make the bottom of the car. Then draw two lines to make the far fender and side of the front of the car. The line that connects to the bottom of the windshield is at 20 degrees below the horizontal. You have completed the outline of your car!
Now, to begin on the details....
Take your time with these. DRAW LIGHTLY! I cannot stress this enough. At first you will make mistakes and you will have to erase. Here you are adding:
- Door lines/Handle
- Tire detail/3-D
- Side-View mirrors
- Vents (use cross-hatching shading to fill in vents)
- Window border line
- Line that curves from the trunk to the front fender
- Any additional detail you see in your reference picture or the drawing
Next will be the front grill and air vents/intercoolers. The line from the top of the fender will curve down to form the left side of the air vent. The right-bottom corner of the air vent should be just at the halfway point of from the front tire to the far side of the car.
Next, add your headlight detail, and your vent separators. Notice how there is some depth between the separators and the mesh/cross-hatching. The detail of the headlights isn't all that important to be completely honest, because you will smear it later, but throw in some detail.
The middle grill and European license plate are simple, just draw 5 horizontal lines and 6 vertical ones, evenly spaced. Then erase and draw the plate.
Add cross-hatching and separators to the far air vent.
Add detail to the rims. You'll notice a pattern for most rims, and I personally think these rims are kind of difficult to draw. I recommend googling some different types of rims and practicing them before attempting these, but that's just me. (perfectionist!)
Add the same style to your back rims and BAM! An unshaded Audi masterpiece. I'll go over shading in my next tutorial post. Check out my other pages on my blogs for updates on car news, especially if you're in Atlanta.
Labels:
artist,
audi,
bmw,
car show,
cars,
design,
drawings,
how-to,
lamborghini,
mercedes,
sketch,
step-by-step,
technology
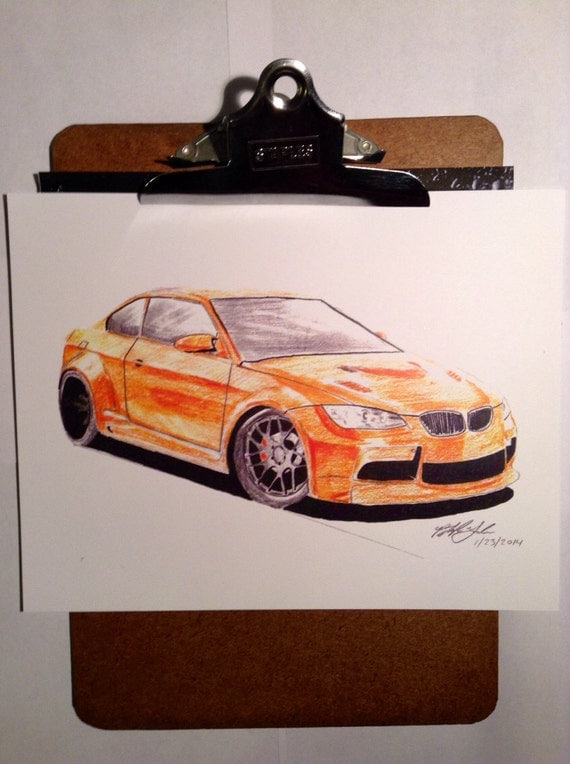
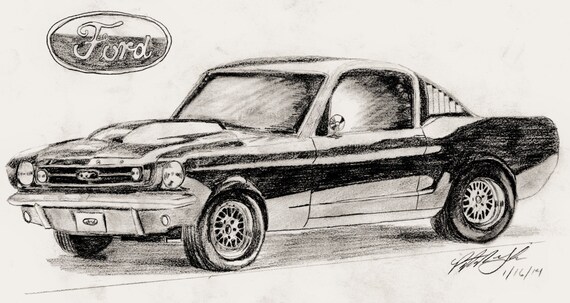
New Page - Etsy Shop Prints!
My Etsy Shop - Products and Prints
"Cars - Designs - Prints" My Etsy store


Awesome Car Prints - Limited Edition
- BMW M3
- Lamborghini Aventador
- Mercedes CLR45 AMG
- Mazda RX-8
- BMW 525i (2003)

Cool Cars - Limited Edition Prints
- 1965 Ford Mustang
- Aston Martin Vanquish
- McLaren P1
- Range Rover
- Audi R8
These are limited edition print of the coolest cars around! MORE COMING SOON!
Want to make your guests know that you're interested in cool cars? Buy one of these limited edition prints!
Contact me about getting a drawing of your favorite car and in color!
Printed on premium matte paper and shipped in protective cardboard envelope.
Want to make your guests know that you're interested in cool cars? Buy one of these limited edition prints!
Contact me about getting a drawing of your favorite car and in color!
Printed on premium matte paper and shipped in protective cardboard envelope.
Tuesday, March 25, 2014
Some cars I've worked on so far..
Mazda RX-8.
Mercedes CLR45 AMG.
Lamborghini Aventador.
My next car that I draw will be an Audi R8, a car that takes a lot of practice to perfect. I will give step by step instructions, but don't worry if yours doesn't come out perfect, this will be my 3rd Audi R8.
Maserati Gran Turismo
Today, we are taking a look at the Maserati GranTurismo coupe. The Maserati, a magnificent blend of power and elegance.
To begin, find your reference picture. Believe it or not, I usually cannot draw pictures of cars out of my head unless they are prototypes. I used the one above. Start by looking at the angle of the line that matches up with the bottom of each tire, and draw a baseline. Then draw the tires (ALWAYS START OFF LIGHTLY!), which will almost almost be an oval shape, not circular. The back tire will also be smaller than the front one in most cases, because of perspective, and for most cars, the space between tires should be about 4 "back-tire-lengths"(See basic tutorial - in making)
After that, draw the line that will connect the tires that will be parallel to your baseline. Next, draw your fenders (the part that sticks out somewhat over the tires) and notice that there is space between the fender and the tire in some places (this will be shaded completely black later). After essentially creating the bottom half of the car, using the reference picture, figure out how far the bottom of the window is from the bottom of the car, and draw a parallel line. Don't worry about the side-view mirrors yet unless you really want to.
Next, draw the line that represents the bottom of the windshield, which, in this case, is parallel to the horizontal side of the page, maybe with a very slight angle above it. This line should also be about 4 "back-tire-lengths". From this line, you can create the shape of the top of the car. For most cars, the line from the far side of the windshield to the trunk will be one smooth curve. Then you can draw the top of the windshield, which should be a somewhat shorter line that is parallel to the bottom of the windshield. the right end of this line should line up with the top of the driver's window.
Now the only part that is left of the outline is the hood (yay!). Start with the bottom of your front fender, and draw a line that is parallel to the horizontal part of the page. At the end of that line, there will be a slight curve upward. That curve will then go up at a slight angle to the vertical, and slowly curve as it goes toward the line that follows the hood opening. Then, a separate line is drawn between there and the bottom of the windshield.
Once you have the basic outline, filling in the details (side-view mirrors, headlights, door outline, etc.) isn't too hard. Always consider angles because the shape of the car is determined by the angles, and the shape defines the brand of vehicle. Window shape, in particular, is unique for most manufacturers. For shading, always start out lightly! Be prepared to make mistakes and have to erase. For windshields, a good technique to make them look good is to shade the upper right corner of the driver's side the darkest, then gradually get lighter across. Then using an eraser, do side swipes to create a smearing effect (you can see it in my last picture).
That's all I have for today, next time, I will upload a picture-by-picture tutorial, so the steps are easy to follow. Until next time!
Subscribe to:
Comments (Atom)


